NOTE: We’ve recently updated our service. Learn more
If we’ve not yet migrated you to the new service, click here to see the Current Getting Started with ExpressPlay Tutorial
Getting Started with ExpressPlay (Legacy)
These tutorials take you through the step-by-step process on how to package the content and to use the ExpressPlay Service for streaming and download use cases.
Requirements
- An MP4 file e.g. big_buck_bunny.mp4
- Download and install the Bento4 tools (available from bento4.com)
- An HTTP server running on your computer
- An Android or IOS device connected to the same WiFi and subnet of your HTTP Server e.g. your mobile device can reach your HTTP Server
- Download the ExpressPlayer applicant for either iOS, Android or both
- An ExpressPlay account (can be obtained from https://admin.expressplay.com/)
- The ExpressPlay client evaluation SDK for either iOS or Android or for both

Part A: Play DASH content using the ExpressPlayer app with MS3 token
STEP 1 – Fragment your MP4 file
- MPEG DASH format requires the MP4 files to be fragmented
- Open the terminal to the folder that has the MP4 file
- Use the bento4 tool ‘mp4fragment,’ type the name of your MP4 file and the name of the output fragmented MP4 file.
- For example:
mp4fragment big_buck_bunny.mp4 big_buck_bunny.mf4
STEP 2 – Package and encrypt your content into DASH format
- Always use the Bento4 tool MP4DASH to encrypt and package your content into DASH format.
- You can do by typing the following:
mp4dash --encryption-key=43215678123412341234123412341234:12341234123412341234123412341234 --marlin big_buck_bunny.mf4 -
Note:
- – The command option —encryption-key indicates the content encryption key (CK) to use and it is followed by the key-id (KID) . In this case the value of the KID is equal to: 43215678123412341234123412341234 while the KEY is equal to: 12341234123412341234123412341234
- – The command option —marlin indicates that you want to use Marlin DRM. As MPEG-DASH is a streaming format supported by other DRMs like PlayReady and Widevine, it is possible to use the same MP4DASH tool to signal the use of different DRMs schema within the same stream. For now, we will focus on Marlin.
STEP 3 – Copy the whole “output” folder to your HTTP Server working folder
- Create a folder in your HTTP Web Server working directory.
- – For example on a Mac:
mkdir /Library/WebServer/Documents/video/expressplay
- – For example on a Mac:
- Copy the content of the output folder into the newly created folder.
- – For example on a Mac:
cp -R output/ /Library/WebServer/Documents/video/expressplay
- – For example on a Mac:
- Note:
- – The commands above are just an example, your HTTP Server may have a different folder structure and therefore the folder path may differ from the one provided above.
- – You must configure the MIME-TYPE of your HTTP Server to handle the mime-type for the DASH manifest descriptor file or mpd files. The mime-type for the mpd file needs to be set to application/DASH+xml
STEP 4 – Create an MS3 URL by using the web interface

- Log into your ExpressPlay account
- Click on “TOKENS”
- Click on “Marlin MS3”
- Select Service Mode “Test”
-
Enter the Content ID, this is derived from the KID in step 2
urn:marlin:kid:43215678123412341234123412341234 -
Enter the Content Encryption Key as in step 2
12341234123412341234123412341234 - Enter the Content URL, the location of the MPD on your HTTP Server as in Step 3
- http://video/expressplay/stream.mpd
- Notice: you need to specify the name of IP address of your HTTP Server
- Click on “Get Token”
STEP 5 – The MS3 token
- The ExpressPlay web interface will create the token for you. Save the MS3 token so that you can re-use it later.
- When using the MS3 token in the later part of this tutorial, make sure to set the protocol to ms3:// instead of https://
ms3://ms3.test.expressplay.com:8443/hms/ms3/rights/?b=AA8ABAADDekABVFHLURTZjwAEEsqWZC9-z6jx6rrAatY-H8AcCg-e25s2L4PQebvqBkAcuIrc5bNX6NzqDZC7X1_9eQJFfGLg0dFFOX-hrCq7w4GKEI1smeztFvpOmpHaZ0bGz7XoqP_6R7_Zw1tFDGtqJHEmhBCz9Aleth8vCXrL76dDHzu6CnKB7o0rttIJO3WMQ8AAAAUeWZFHNJ7jesRYMtgkO7FQ25JxOQ#http%3A%2F%2F192.168.1.243%2Fvideo%2Fexpressplay%2Fstream.mpd - In a real deployment scenario, your Front-end service will request the token to the ExpressPlay Service using the REST API. The token is then passed to the device and processed immediately by the ExpressPlay client SDK
- In the next step we will see how the client SDK processes the token to access the protected content
STEP 6 – Play Content using the ExpressPlayer App

- Download the ExpressPlayer App from the Google Play Store
- Open the ExpressPlayer App
- Click on “Video”
- Select DASH
- Paste the MS3 URL obtained from Step 5
- Select MS3
- Click “Play”
Part B: Play DASH content using your own iOS app, with MS3 token
STEP 1 – Fragment your MP4 file
- MPEG DASH format requires the MP4 files to be fragmented
- Open the terminal to the folder that has the MP4 file
- Use the bento4 tool ‘mp4fragment,’ type the name of your MP4 file and the name of the output fragmented MP4 file.
- For example:
mp4fragment big_buck_bunny.mp4 big_buck_bunny.mf4
STEP 2 – Package and encrypt your content into DASH format
- Always use the Bento4 tool MP4DASH to encrypt and package your content into DASH format.
- You can do by typing the following:
mp4dash --encryption-key=43215678123412341234123412341234:12341234123412341234123412341234 --marlin big_buck_bunny.mf4 -
Note:
- – The command option —encryption-key indicates the content encryption key (CK) to use and it is followed by the key-id (KID) . In this case the value of the KID is equal to: 43215678123412341234123412341234 while the KEY is equal to: 12341234123412341234123412341234
- – The command option —marlin indicates that you want to use Marlin DRM. As MPEG-DASH is a streaming format supported by other DRMs like PlayReady and Widevine, it is possible to use the same MP4DASH tool to signal the use of different DRMs schema within the same stream. For now, we will focus on Marlin.
STEP 3 – Copy the whole “output” folder to your HTTP Server working folder
- Create a folder in your HTTP Web Server working directory.
- – For example on a Mac:
mkdir /Library/WebServer/Documents/video/expressplay
- – For example on a Mac:
- Copy the content of the output folder into the newly created folder.
- – For example on a Mac:
cp -R output/ /Library/WebServer/Documents/video/expressplay
- – For example on a Mac:
- Note:
- – The commands above are just an example, your HTTP Server may have a different folder structure and therefore the folder path may differ from the one provided above.
- – You must configure the MIME-TYPE of your HTTP Server to handle the mime-type for the DASH manifest descriptor file or mpd files. The mime-type for the mpd file needs to be set to application/DASH+xml
STEP 4 – Create an MS3 URL by using the web interface

- Log into your ExpressPlay account
- Click on “TOKENS”
- Click on “Marlin MS3”
- Select Service Mode “Test”
- Enter the Content ID, this is derived from the KID in step 2
- urn:marlin:kid:43215678123412341234123412341234
- Enter the Content Encryption Key as in step 2
- 12341234123412341234123412341234
- Enter the Content URL, the location of the MPD on your HTTP Server as in Step 3
- http://video/expressplay/stream.mpd
- Notice: you need to specify the name of IP address of your HTTP Server
- Click on “Get Token”
STEP 5 – The MS3 token
- The ExpressPlay web interface will create the token for you. Save the MS3 token so that you can re-use it later.
- When using the MS3 token in the later part of this tutorial, make sure to set the protocol to ms3:// instead of https://
ms3://ms3.test.expressplay.com:8443/hms/ms3/rights/?b=AA8ABAADDekABVFHLURTZjwAEEsqWZC9-z6jx6rrAatY-H8AcCg-e25s2L4PQebvqBkAcuIrc5bNX6NzqDZC7X1_9eQJFfGLg0dFFOX-hrCq7w4GKEI1smeztFvpOmpHaZ0bGz7XoqP_6R7_Zw1tFDGtqJHEmhBCz9Aleth8vCXrL76dDHzu6CnKB7o0rttIJO3WMQ8AAAAUeWZFHNJ7jesRYMtgkO7FQ25JxOQ#http%3A%2F%2F192.168.1.243%2Fvideo%2Fexpressplay%2Fstream.mpd - In a real deployment scenario, your Front-end service will request the token to the ExpressPlay Service using the REST API. The token is then passed to the device and processed immediately by the ExpressPlay client SDK
- In the next step we will see how the client SDK processes the token to access the protected content
STEP 6 – SDK Download

- Log in to your ExpressPlay account
- Select DRM Services
- Download the test iOS SDK
Note: ExpressPlay provides test and production SDKs and associated cloud service. Development and testing should be done using the test SDK while production SDKs must be used with a commercial service
STEP 7a – iOS Sample

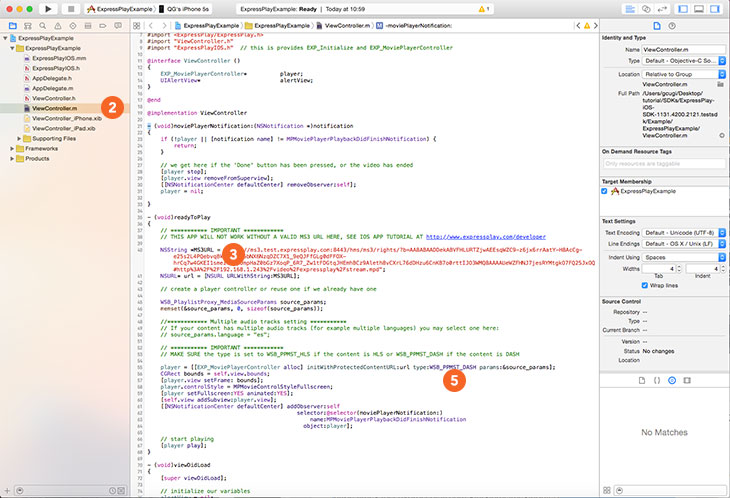
- Open the ExpressPlayExample project in Xcode
- Open the ViewController.m file within the project
- Replace the value of the MS3URL variable with the one obtained in step 5
- Set the media stream type to WSB_PPMST_DASH
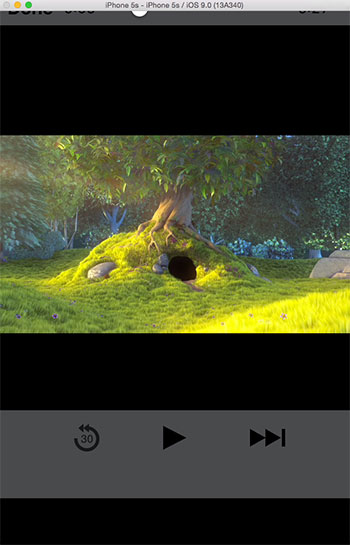
- Run your code (you can choose to run it on an emulator or an iOS device)
Part C: Play DASH content, get the MS3 token programmatically from ExpressPlay service
STEP 1 – Fragment your MP4 file
- MPEG DASH format requires the MP4 files to be fragmented
- Open the terminal to the folder that has the MP4 file
- Use the bento4 tool ‘mp4fragment,’ type the name of your MP4 file and the name of the output fragmented MP4 file.
- For example:
mp4fragment big_buck_bunny.mp4 big_buck_bunny.mf4
STEP 2 – Package and encrypt your content into DASH format
- Always use the Bento4 tool MP4DASH to encrypt and package your content into DASH format.
- You can do by typing the following:
mp4dash --encryption-key=43215678123412341234123412341234:12341234123412341234123412341234 --marlin big_buck_bunny.mf4 -
Notice:
- – The command option —encryption-key indicates the content encryption key (CK) to use and it is followed by the key-id (KID) . In this case the value of the KID is equal to: 43215678123412341234123412341234 while the KEY is equal to: 12341234123412341234123412341234
- – The command option —marlin indicates that you want to use Marlin DRM. As MPEG-DASH is a streaming format supported by other DRMs like PlayReady and Widevine, it is possible to use the same MP4DASH tool to signal the use of different DRMs schema within the same stream. For now, we will focus on Marlin.
STEP 3 – Copy the whole “output” folder to your HTTP Server working folder
- Create a folder in your HTTP Web Server working directory.
- – For example on a Mac:
mkdir /Library/WebServer/Documents/video/expressplay
- – For example on a Mac:
- Copy the content of the output folder into the newly created folder.
- – For example on a Mac:
cp -R output/ /Library/WebServer/Documents/video/expressplay
- – For example on a Mac:
- Note:
- – The commands above are just an example, your HTTP Server may have a different folder structure and therefore the folder path may differ from the one provided above.
- – You must configure the MIME-TYPE of your HTTP Server to handle the mime-type for the DASH manifest descriptor file or mpd files. The mime-type for the mpd file needs to be set to application/DASH+xml
STEP 4 – Get the required information
In a real deployment, one wants to generate tokens programmatically, not using a web interface. ExpressPlay service provides an API to do so.
The API documentation for generating MS3 tokens is located here: http://www.expressplay.com/developer/restapi#ms3-token-request

To use the API, you need to know the API URL and your API key.
You can find this information in your ExpressPlay dashboard:
- Log in to your ExpressPlay account
- Find your Test Customer Authenticator (API key)
- Get the Test Service URL for making Test MS3 Token Requests
STEP 5 – Request an MS3 token using the service API
Now that we have the required information, let’s build the request with the required arguments:
- URL = https://ms3-gen.test.expressplay.com + /hms/ms3/token (see documentation for more details)
- customerAuthenticator = USE YOUR CUSTOMER AUTHENTICATOR
- contentId = urn:marlin:kid:43215678123412341234123412341234
- contentKey = 12341234123412341234123412341234
- contentURL = www.test1234.com/test/test/test.mp4
- wudo param (to allow HD content playbackl): ms3Extension=wudo,false,AAAAAA==
Here is the complete request:
GET https://ms3-gen.test.expressplay.com/hms/ms3/token?customerAuthenticator= USE YOUR CUSTOMER AUTH.CODE&contentId=urn:marlin:kid:43215678123412341234123412341234&contentKey=12341234123412341234123412341234&ms3Extension=wudo,false,AAAAAA==&contentURL=https://192.168.1.243/video/expressplay/stream.mpd
In this example, we execute the request with curl (see screenshot). We receive the MS3 URL as a response.
STEP 6 – Test the token in the OS sample

- Open the ExpressPlayExample project in Xcode
- Open the ViewController.m file within the project
- Replace the value of the MS3URL variable with the one obtained in the 5
- Set the media stream type to WSB_PPMST_DASH
- Run your code (you can choose to run it on an emulator or an iOS device)
STEP 7 – Compile & Run

Overview
- This tutorial will cover the following:
- To package of a video into DASH format with PlayReady, Widevine and Marlin signaling.
- To request a PlayReady and a Widevine token via command line
- To play the content from a web browser
Assumptions
- This tutorial follows assumes the following
- You have a fragmented MP4 file e.g. video_mango.mp4
- You have downloaded and installed the Bento4 tools (available from bento4.com)
- You have an ExpressPlay account (can be obtained from https://admin.expressplay.com/)
- You have an Amazon AWS S3 account (https://aws.amazon.com/s3/)
STEP 1 – Fragment your MP4 file
- MPEG DASH format requires the MP4 files to be fragmented
- Open the terminal to the folder that has the MP4 file
- Use the bento4 tool ‘mp4fragment,’ type the name of your MP4 file and the name of the output fragmented MP4 file.
- For example:
mp4fragment video_mango.mp4 video_mango.mf4
STEP 2 – Create the DASH content
- Open the terminal to the folder where you have you MP4 file
- Use the bento4 tool mp4dash and type the following:
mp4dash --encryption-key=12341234123412341234123412341234:43215678123412341234123412341234 --marlin --widevine --widevine-header=provider:intertrust#content_id:2a --playready --playready-header= https://pr.service.expressplay.com/playready/RightsManager.asmx video_mango.mf4 - We do suggest to study documentation of each of the bento4 tool
STEP 3 – Copy the “output” folder to your S3 bucket

- Copy the “output” folder obtained from the previous step into a S3 bucket
- Ensure that the mime-type of the .mpd file is set to: application/dash+xml
- Ensure that all the files within the buckets output folder are “made public”
STEP 4 – Setting CORS Configurations

- Set the CORS of your S3 bucket as following:
<?xml version="1.0" encoding="UTF-8"?>

<CORSConfiguration xmlns="http://s3.amazonaws.com/doc/2006-03-01/">

    <CORSRule>

        <AllowedOrigin>*</AllowedOrigin>

        <AllowedMethod>GET</AllowedMethod>

        <AllowedMethod>POST</AllowedMethod>

        <MaxAgeSeconds>3500</MaxAgeSeconds>

        <AllowedHeader>*</AllowedHeader>

    </CORSRule>

</CORSConfiguration>
STEP 5 – Request content licenses
- Using the command line:
- Widevine token request:
curl -k 'https://wv-gen.test.expressplay.com/hms/wv/token?customerAuthenticator=YOUR_CUSTOMER_AUTHENTICATOR_CODE&errorFormat=json&kid=12341234123412341234123412341234&contentKey=43215678123412341234123412341234&securityLevel=1&hdcpOutputControl=0' - Please refer to the ExpressPlay Service API documentation for: https://www.expressplay.com/developer/restapi/
STEP 6 – Playback on Chrome / Shakaplayer and Widevine
- Using the Shaka Player player from: http://shaka-player-demo.appspot.com/demo/
- Select “custom asset”
- Copy the URL of the .mpd file to the first input filed
- Copy the License Acquisition URL including the token, from the Widevine token request, to second input field.


